Tuesday 29 November 2011

One a day: Hexipuffs!

Hello lovelies!

Well, the moment is here. I made my first hexipuffs. Still figuring out the best way to make them perfectly shaped, but I'll get there!

Pattern Beekeeper's Quilt from Tiny Owl Knits


I'm most happy with the bottom one. The yarn is so soft and is a bliss to work with. 

But, hexipuffs are not the only thing that is in progress:


Crochet Star garland! You can find the pattern here.

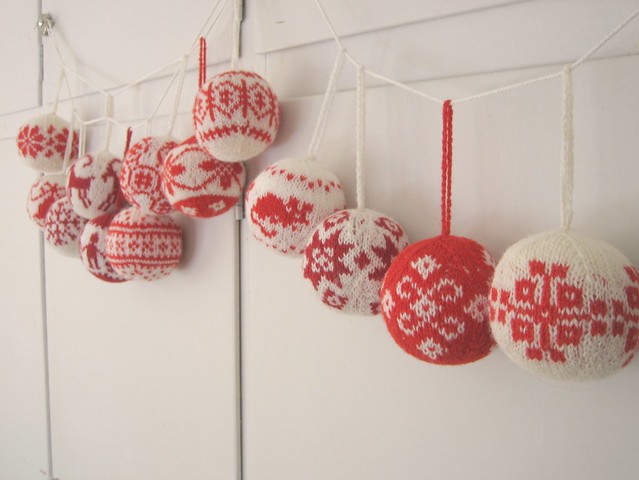
And more Christmas projects, one is already done; the star ornaments from Lucy. 

Star decoration from Attic24

I'll keep it short, since there is much decoration needed before the end of the week! Good luck on your One a day and Christmas projects. If you're not busy with that or you have need for more gorgeous projects go here for more inspiration. 


Tuesday 22 November 2011

All I want for Christmas...

I know a lot of you are busy working on Christmas ornaments, presents or decorations. I had big plans, but unfortunately I am behind! So I decided to make a list of the things I want to make for Christmas and share it with you.

1. Little snowmen. These are knitted, I want to make a crochet version.

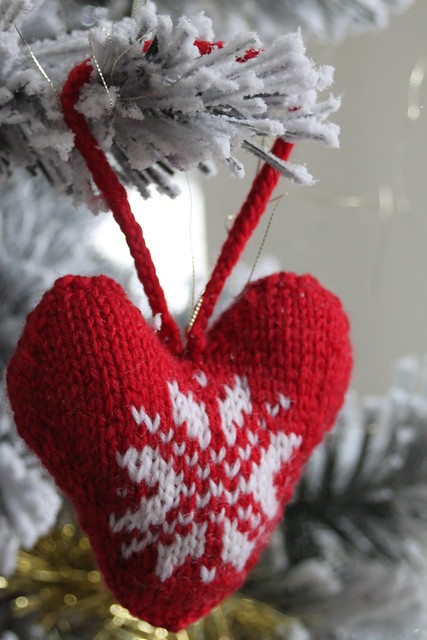
2. Winter hearts


Well, better get to it. Do you have any Christmas ornaments on the hook/needle? 


I want to leave you with a little youtube clip I spotted on the Easy makes me happy blog. If you like scarfs, this is a must see! 


One a day: changes

My last One a day post was in October, shame on me! I have been making a few pebble, put I didn't make one a day at all! I don't enjoy this project as much as I thought I would. And the fact that I just started a knitting journey doesn't help either. I love to learn new things and knitting is one of those. I never thought I could manage two needles instead of one hook. It looked so confusing and difficult, but fortunately we are blessed by Youtube! 


So, I have 21 pebbles right now and I have decided to leave them for a while. They are grey and sophisticated, but what I need is a bit of craziness and color. 


So, I will start a new One a day project....

Picture taken from Tiny Owl Knits on Ravelry

I tried, I tried so hard NOT to get infected by the virus going around the knitty world for a while now; the beekeeper's virus. But I just cannot resist anymore. They are too soft and squishy. 

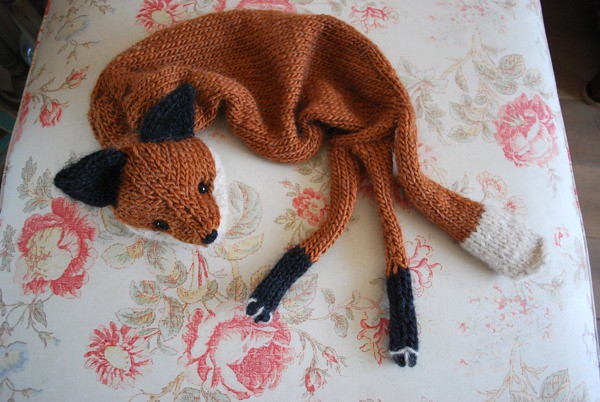
I joined the Tiny Owl Knits Group on Ravelry since I am currently knitting Mr. Fox! And once I joined the Ravelry group I just got sucked right in the madness. It's such a crazy (in a good way) bunch of people over there, all very enthusiastic and helpful (although most of the people on Ravelry are haha). I love that the group is very active and lots of exiting things are going on. 

Picture taken from Tiny Owl Knits on Ravelry

I can see what you're thinking right now: if you can't keep the pebble rug going, how on earth will you continue working on a beekeeper's quilt? Well, I must admit that is exactly my concern. So I decided not to make a quilt, but one (or two) pillows. That should be a fine goal right? 

For those of you that don't know the beekeepers quilt, I want to direct you to a little video that the designer made. See  if you can resist making them after you watched ;-). 


Friday 18 November 2011

Mitten Mania


They are finished! My very first double pointed needle project. There are so many tiny errors made and they are far from perfect, but it’s a first step in a world of many more dpn projects. I loved this journey and I can really recommend the pattern that I used.  


The only thing I found confusing was the “turning round”. In the pattern you start off with some knitting rounds and a turning round. I was confused, starting with knitting? How about this little picot edge? Well, no worries. The picot edge is made by turning the hem, so you fold the edge to the inside of your mitten and sew it.


On the left you see my mitten with the hems not turned yet. On the right the hems are turned and sewn to the inside. 


I hope you understand what I mean haha. 

I really enjoy them although I might add one extra thing. I want to add a little ribbon waved through the lacy part at the bottom of the mitten. I am not sure about what color to use though….blue…or just plain white….Any suggestions? 

Good thing Puck also enjoys my soft mittens haha. 


Wednesday 16 November 2011

Polar tea cozy


Brrrrrrrrrrrrrrrrr, it is soooo cold right now in Holland. I have to hurry up and knit me some warm mittens and hat! Inspired by the freezy breezy outside world, a warm and cozy project was made with a hot cup of tea. 

My third tea cozy! One of them was a present for my mom and I never blogged about it and the other one was for my mother in law. This one however, is allll mine. It's not suffisticated, it's not classy or vintage, it's corny and cute and even a bit childish. But I don't care about that, I love it! Want to see it? 


here we go......


TADAAAAAAAAAAAAAAA:


Do you like it? On to the details:

I used the knitting pattern of Alice for the base of the cozy (THANK YOU Alice, for sharing this pattern! It has been a huuuuge help). I knitted with needles size 5.0 mm since my yarn was a bit more bulky. I used very cheap blue yarn from a dutch store called Zeeman and adjusted the amount of stitches to cast on (I only  casted on 60 stitches). I also think my tea pot is smaller.

I did a little simple single crochet edge so it didn't curl anymore and a small button for the closing it at the handle.

I randomly made some crochet circles for the floes (I am not sure what I did so I don't have a pattern, I am very sorry!). And then, I made these little super cute (excuse me for sounding arrogant :p) baby penguins and a little baby seal! I made the patterns myself and I wrote the penguin pattern down so you can all make some very cute baby penguins for your own cozy, in the Christmas tree or on a key chain. I am so pleased I can finally present you with something finished, it has been too long haha. I'll leave you with the pattern for the baby penguin.


Baby penguin

This pattern is using the "crochet in the continual round" technique, used for a lot of amigurumi projects. 

sc = Single crochet (this would be double crochet in the UK)
dec = decrease, single crochet two stitches together

Magic Ring: check here for a clip on how to use the magic ring. You can also chain 4 and join to form a ring, but this will leave a small hole. 

Head
With black cotton and a crochet hook size 3.0 mm (US size 2.5 I believe):

1.
Make a magic ring
Stitches:
2.
6 sc in the ring, pull ring tight
6
3.
2 sc in each stitch
12
4.
*1 sc, 2 sc in next stitch* repeat until end of the round
18
5. – 8.
Sc. around
18
9.
*sc 7, dec 1* repeat until end of the round
16

Fasten off.


Body
With grey yarn with a bit of mohair and hook size 3.0 mm:

1.
Make a magic ring
Stitches:
2.
6 sc in the ring, pull ring tight
6
3.
2 sc in each stitch
12
4.
*1 sc, 2 sc in next stitch* repeat until end of the round
18
5.
*sc8, 2 sc in next stitch* repeat until end of the round
20
6.
*sc 8, dec 1* repeat until end of the round
18
7.
*sc 7, dec 1* repeat until end of the round
16
8. - 10.
Sc. Around
16

Fasten off leaving long tail for sewing


Arm (make 2)
With same hook and yarn as used for body:

1.
Make a magic ring
Stitches:
2.
4 sc in the ring, pull ring tight
4
3. – 4.
Sc around
4

Fasten off leaving long tail for sewing


Tail
With same hook and yarn as used for body:

Chain 5 and connect to the first chain to form a ring. Fasten off leaving a long tail to sew


Cut out a face from white or cream colored velt and a beak from grey colored velt. Glue the white and grey velt pieces to the head. Stick two small black eyes through the velt in the head.

Stuff the head and the body firmly and sew them together.

Sew the tail and the arms to the body.


Hugs and kisses from me and sleepy Puck! 


P.S: If you have any questions, please email me :-)

Friday 11 November 2011

little update

Just wanted to say hi to you all! I am alive haha. I want to share a special trip with you, we went to Germany. We drove for three hours and we arrived at our destination: Piesberg near Osnabrugge. That's the beauty of living in Holland. Just drive a few hours and you are in another country with another language and different habits. I totally love it. 

But why would we go there? Well, we went on a mission. 


We went on fossil hunting in a quarry. Another hobby of me and my family we are doing once in a while. We have collected quite some nice pieces already, including some tiny fish! This time the hunt was for plants and insects and also crystals. They have being lying around here for over 300 million years, time for them to be found! 

Of course you need some protection when going to a quarry. Don't we look a cute with our little helmets and all the smudges on our cheeks? Do you see how tall my baby brother is? He is a giant! And Mr. L. who also joined the trip is so tiny like me, I think our kids will be midgets. 


Splitting and checking every stone for treasure.


You feel pretty small when sitting in such a massive pit, surrounded by an ancient world. What a teeny weeny lifespan humans have if you look at the time scale of our lovely planet. I find it hard to imagen and it makes me so curious!

Here is an example of some treasure we brought home: 


I won't go on rambling about fossils and stones, this is a yarny blog after all. And yarn is getting higher on the agenda right now, since it is WEEKEND. Weeehooooee. Let's check some of the boxes on my waaaaaaaaaay to long to-make list. Many of them involve Christmas projects and it is going so fast! I also have some more soft stones to make (it seems I am still rambling on about stones haha :p) for my rug and I am working on a very cute tea cozy if I can say so myself. Can't wait to share!

Have a nice and hopefully yarny weekend. 

xxx Suzanne

Thursday 3 November 2011

mitten madness

It's been awefully quiet here at Crea in the City. I have been away some time from blogland and I missed it very  much! Life has been passing by so fast. But, I have decided to make some time for a little post on my mittens.

I am not really a knitter, I find it complicated and I always manage to let my stitches slip of the needles. But I have practiced a lot and seen a lot of youtube clips and know I do see the beauty and the fun in knitting. I have tackled my fear for double pointed needles and my first mitten is done! 


I love the lace effect it has on the bottom and the top.


There are a lot of mistakes in this project, I tend to make the second one much neater. But overall I am pretty pleased with it. I never thought I could work on DPN's or make a thump gusset! I didn't know some things that were written in the pattern. 

How to get the circle started for example? I found the answer here in this clear video. Don't forget to put a stitch marker on your first knitted stitch to keep track of the rounds. 

With the thump gusset I got a little scared, make 1? What is make 1? Placing the stitches on waste yarn? I found a lot of help in this clip. It's a clip about making mittens and this part is all about making a thump gusset. I found it very useful. 

The pattern is really well written and if you just follow it, you should be fine. There was some confusion at the beginning though about how to get the edge of the mitten with a sort of picot edge. I just start following the pattern. You turn the hem at the end of the project at the top and bottom of the project. So you "fold" the first and last part of your project to the inside and attached by sewing. So you make 4 of the lace rounds with the little holes, but you will see only 2. I should have made some pictures to make it more clear, I will try to do so with the second mitten. 

I plan to make some more mittens, because once you get the idea it is really easy. So let's get busy with my second mitten!